2020년 12월 16일
업데이트:
배경색 바꾸기
색변경 버튼을 클릭하면 input에 입력된 값에 따라 네모칸의 배경색이 바뀐다.

<!DOCTYPE html>
<html lang="ko">
<head>
  <meta charset="UTF-8">
  <meta name="viewport" content="width=device-width, initial-scale=1.0">
  <title>html문서 제목</title>
  <style>
          .area{
          width :100px;
          height:100px;
          box-sizing: border-box;
          border : 1px solid black;
          display : inline-block;

          transition-duration : 2s;
      }

      .inputColor{
          padding : 0;
          margin :0;
          box-sizing : border-box;
          width: 100px;
          display : inline-block;
          transition-duration:2s;
      }

  </style>
</head>
<body>
  <div class="area" id="area1"></div>
  <div class="area" id="area2"></div>
  <div class="area" id="area3"></div>
  <div class="area" id="area4"></div>
  <div class="area" id="area5"></div>
  <div class="area" id="area6"></div>
  <br>
  <input type="text" class="inputColor" id="color1">
  <input type="text" class="inputColor" id="color2">
  <input type="text" class="inputColor" id="color3">
  <input type="text" class="inputColor" id="color4">
  <input type="text" class="inputColor" id="color5">
  <input type="text" class="inputColor" id="color6"> <br><br>
  <button type="button" id="btn">색변경</button>

  <script>
      document.getElementById("btn").onclick = function(){
          var inputlist = document.getElementsByClassName("inputColor");

          var arealist = document.getElementsByClassName("area");
          for(var i=0; i<inputlist.length; i++){
              arealist[i].style.backgroundColor = inputlist[i].value;
          }


      }
  </script>

</body>
</html>
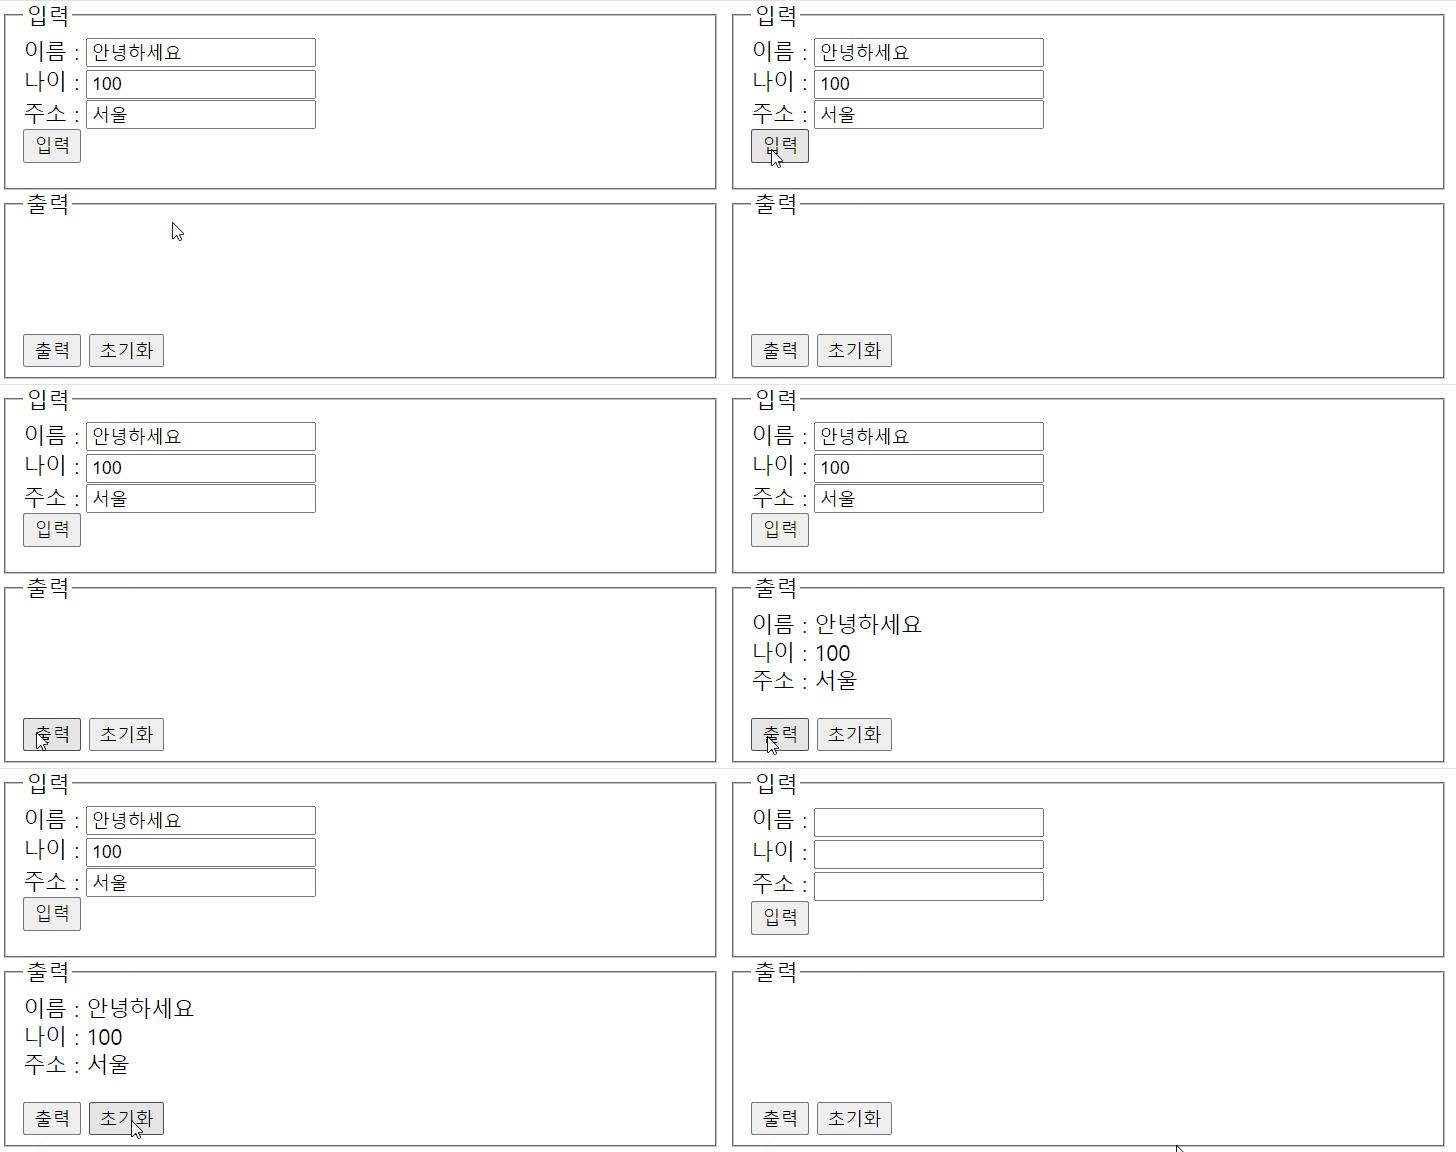
입력된 정보 출력
입력창에 값을 입력한 후, 입력 버튼을 누르고 출력 버튼을 누르면 입력한 값이 출력 창에 출력된다.
입력값이 없을 때 출력 창을 클릭하면 경고창이 뜬다.
초기화버튼을 누르면 입력/출력 창이 전부 비워진다.

<!DOCTYPE html>
<html lang="ko">
<head>
<meta charset="UTF-8">
<meta name="viewport" content="width=device-width, initial-scale=1.0">
<title>html문서 제목</title>
<style>
        fieldset{
    width:500px;
    height:120px;
}
#area{
    height:80px;
}
</style>
</head>
<body>
    <fieldset>
        <legend>입력</legend>
        <label for="userNm">이름 : </label>
        <input type="text" class="info" id="userNm"><br>
        <label for="userAge">나이 : </label>
        <input type="text" class="info" id="userAge"><br>
        <label for="userAdd">주소 : </label>
        <input type="text" class="info" id="userAdd"><br>
        <button type="button" id="btn1" onclick="inputFn()">입력</button>
    </fieldset>
    <fieldset>
        <legend>출력</legend>
        <div id="area"></div>
        <button type="button" id="btn2" onclick="outputFn()">출력</button>
        <button type="button" id="reset">초기화</button>
    </fieldset>

<script>
var info;

// function Info(infoList){
//   this.name = infoList[0].value;
//   this.age = infoList[1].value;
//   this.address = infoList[2].value;

//   this.printInfo = function(){
//    return "이름 : " + this.name +"<br>" + "나이 : " + this.age + "<br>" + "주소 : " + this.address;
//   }
// }

// 입력버튼
function inputFn(){
    var infoList = document.getElementsByClassName("info");

    // info = new Info(infoList);

    info = {
            name : document.getElementById("userNm").value,
            age : document.getElementById("userAge").value,
            addr : document.getElementById("userAdd").value,

            printInfo : function() {
                return "이름 : " + this.name + "<br>나이 : " + this.age + "<br>주소 : " + this.addr;
            }
    }
}


// 출력버튼
function outputFn(){
    if(info==null ||info.name==""||info.age==""||info.address==""){
    // ||info.name==""||info.age==""||info.address==""  안 해도 됨.
    alert("입력부터 진행해 주세요")
    }else{
    document.getElementById("area").innerHTML = info.printInfo();
    }
}


// 초기화버튼
document.getElementById("reset").onclick = function(){

    // div 영역 innerHTML 로 ="";
    document.getElementById("area").innerHTML = "";

    // input 영역 value 를 ="";
    document.getElementById("userNm").value = "";
    document.getElementById("userAge").value = "";
    document.getElementById("userAdd").value = "";

    info = undefined;
}


</script>
</body>
</html>
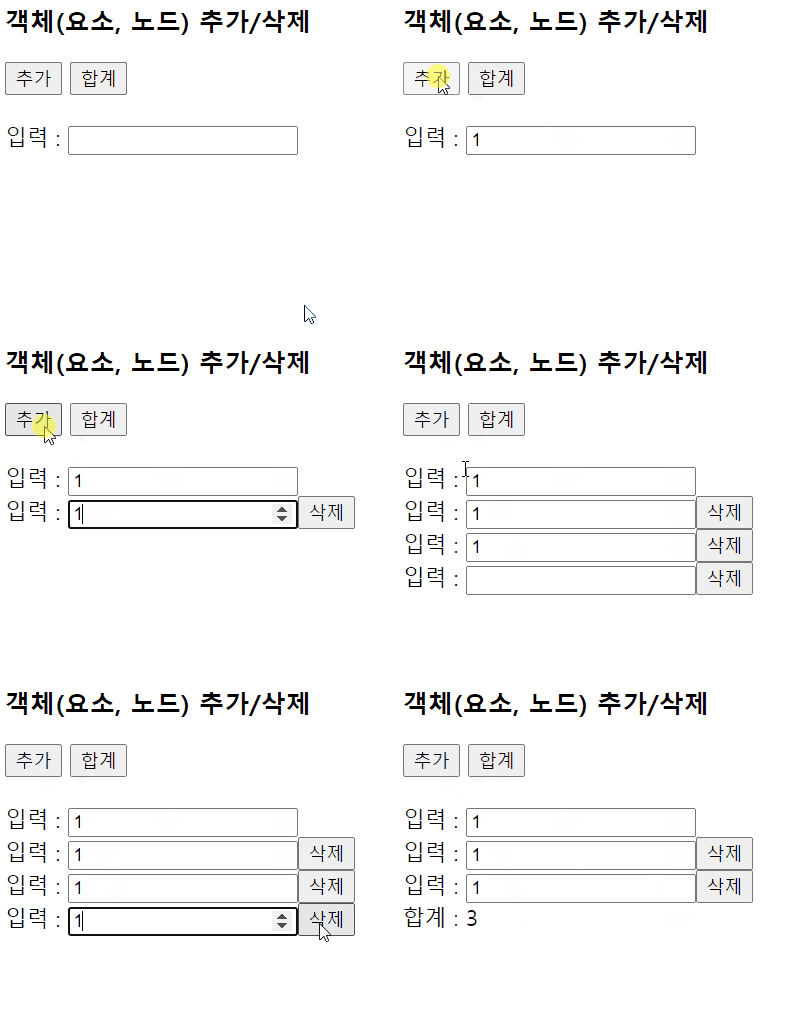
객체 추가/삭제
-
추가 버튼 클릭 시 id가 wrapper3인 영역에 주석에 작성된 모양의 객체를 생성하여 마지막 자식으로 추가하기
-
삭제 버튼 클릭 시 deleteRow 함수를 호출하여 해당 클릭 한 삭제버튼이 있는 줄을 삭제
-
합계 버튼 클릭 시 input 태그에 작성된 모든 숫자를 더하여 id가 printArea3인 영역에 출력

<!DOCTYPE html>
<html lang="ko">
<head>
    <meta charset="UTF-8">
    <meta name="viewport" content="width=device-width, initial-scale=1.0">
    <title>html문서 제목</title>
</head>
<body>
    <pre>
        - 추가 버튼 클릭 시 id가 wrapper3인 영역에 주석에 작성된 모양의 객체를 생성하여 마지막 자식으로 추가하기
        <!--
            <div>
                입력 : <input type="number" class="inputNumbers">
                <button type="button" onclick="deleteRow(this)">삭제</button>
            </div>
         -->

        - 삭제 버튼 클릭 시 deleteRow 함수를 호출하여 해당 클릭 한 삭제버튼이 있는 줄을 삭제

        - 합계 버튼 클릭 시 input 태그에 작성된 모든 숫자를 더하여 id가 printArea3인 영역에 출력

        </pre>


    <h3>객체(요소, 노드) 추가/삭제</h3>

    <button type="button" id="add">추가</button>
    <button type="button" id="sum">합계</button>
    <br><br>
    입력 : <input type="number" class="inputNumbers">

    <!-- 객체 추가 영역-->
    <div id="wrapper3"></div>

    <!-- 합계 출력 영역 -->
    <div id="printArea3"></div>

    <script>
        // 추가 버튼 클릭 시
        document.getElementById("add").onclick = function(){
            // 1. div 태그 생성
            var div = document.createElement("div");

            // 2. "입력" 텍스트 노드 생성 후 div 에 추가
            // div.innerHTML = "입력 : "; 도 가능함.

            var text = document.createTextNode("입력 : ");
            div.appendChild(text);

            // 3. input 태그 생성 후, 속성을 추가한 다음 div에 추가
            var input = document.createElement("input");
            input.setAttribute("type","number"); // type 속성 추가
            input.setAttribute("class","inputNumbers"); //class 속성 추가
            div.appendChild(input);

            // 4. button 태그 생성 후, 속성을 추가, '삭제' 추가한 다음 div에 추가
            var button = document.createElement("button");
            button.setAttribute("type","button");
            button.setAttribute("onclick","deleteRow(this)");
            button.innerHTML = "삭제";
            div.appendChild(button);

            // id가 wrapper3인 영역에 div 추가
            document.getElementById("wrapper3").appendChild(div);
        }

        function deleteRow(el){
            // el에는 클릭된 버튼이 담겨있음.

            // 클릭된 버튼의 부모 요소(부모 노드)를 선택해서 제거 == 한 줄 삭제
            el.parentNode.remove();
        }

        document.getElementById("sum").onclick = function(){
            var num = document.getElementsByClassName("inputNumbers");

            var sum =0;

            for(var item of num){
                // input 태그에 작성된 value의 자료형은 String이다
                sum += Number(item.value);
            }
            document.getElementById("printArea3").innerHTML = "합계 : " + sum;
        }
    </script>

</body>
</html>
색 바꾸기2
네모칸에 마우스를 올리면 input 값에 따라 배경색이 바뀐다.
마우스를 내리면 다시 초기색으로 돌아간다.

<!DOCTYPE html>
<html lang="ko">
<head>
    <meta charset="UTF-8">
    <meta name="viewport" content="width=device-width, initial-scale=1.0">
    <title>html문서 제목</title>
    <script src="https://code.jquery.com/jquery-3.5.1.min.js"></script>
    <style>
        * {
            margin: 0;
            padding: 0;
            box-sizing: border-box;
        }


        .area {
            display: inline-block;
            width: 100px;
        }

        .box {
            width: 100%;
            height: 100px;

            border: 1px solid black;
            text-align: center;
            line-height: 100px;
            cursor: pointer;
            transition-duration: 0.5s;
        }

        .input-box {
            width: 100%;
            margin: auto;
        }
    </style>
</head>
<body>
    <pre>
        box에 마우스가 들어갔을 경우 아래 input 태그에 작성된 배경색으로 변경하기
        마우스가 나가면 원래대로 돌아오기
        </pre>

        <div class="area">
            <div class="box"></div>
            <input type="text" class="input-box">
        </div>
        <div class="area">
            <div class="box"></div>
            <input type="text" class="input-box">
        </div>
        <div class="area">
            <div class="box"></div>
            <input type="text" class="input-box">
        </div>
        <div class="area">
            <div class="box"></div>
            <input type="text" class="input-box">
        </div>
        <div class="area">
            <div class="box"></div>
            <input type="text" class="input-box">
        </div>

    <script>
        $(".box").on("mouseenter",function(){

            var input = $(this).next().val();
            var backgroundColor = $(this).css("backgroundColor");
            $(this).css("backgroundColor",input);
        });

        $(".box").on("mouseleave",function(){
            $(".box").css("backgroundColor", "rgba(0, 0, 0, 0)");
        });
    </script>
</body>
</html>
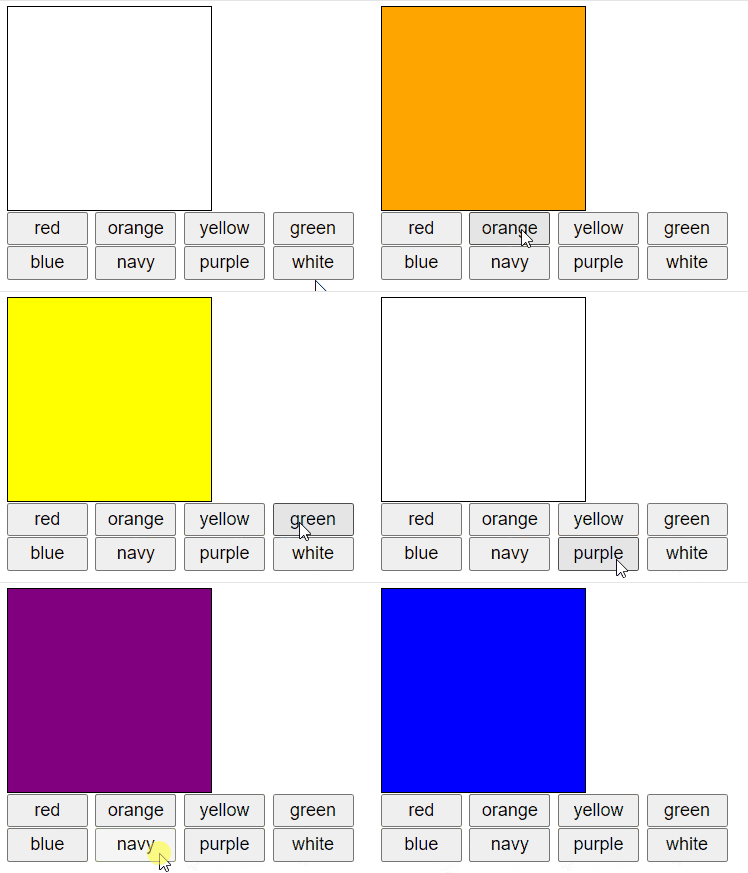
색바꾸기3
클릭한 버튼의 text에 따라 네모칸의 배경색이 바뀐다.

<!DOCTYPE html>
<html lang="ko">
<head>
    <meta charset="UTF-8">
    <meta name="viewport" content="width=device-width, initial-scale=1.0">
    <title>html문서 제목</title>
    <script src="https://code.jquery.com/jquery-3.5.1.min.js"></script>
    <style>
        #area{
            width:150px;
            height:150px;
            border : 1px solid black;
        }
        .color{
            width:60px;
            height:25px;
        }
    </style>
</head>

<body>
    <div id="area"></div>
    <button type="button" class="color">red</button>
    <button type="button" class="color">orange</button>
    <button type="button" class="color">yellow</button>
    <button type="button" class="color">green</button><br>
    <button type="button" class="color">blue</button>
    <button type="button" class="color">navy</button>
    <button type="button" class="color">purple</button>
    <button type="button" class="color">white</button>


    <script>

        $(".color").on("click",function(){
            var color = $(this).text();
            $("#area").css("backgroundColor",color);
        });


    </script>
</body>
</html>
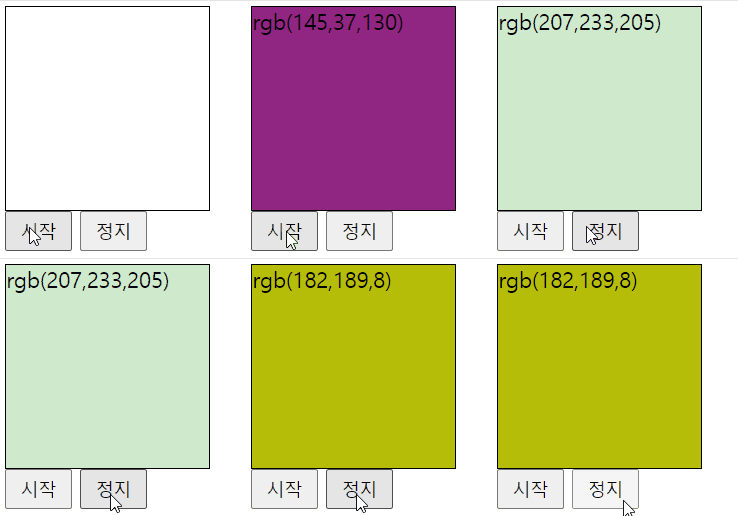
색바꾸기4
네모칸 안에 써진 rgb값에 따라 네모칸의 배경색이 바뀐다.
정지버튼을 누르면 경고창이 뜬 후, 정지된다.

<!DOCTYPE html>
<html lang="ko">
<head>
    <meta charset="UTF-8">
    <meta name="viewport" content="width=device-width, initial-scale=1.0">
    <title>html문서 제목</title>
    <script src="https://code.jquery.com/jquery-3.5.1.min.js"></script>
    <style>
        #area{
        width:150px;
        height:150px;
        border:1px solid black;
        }

        button{
            width:50px;
            height:30px;
        }
    </style>
</head>

<body>
    <div id="area">
        <span id="color"></span>
    </div>
    <button type="button" id="start">시작</button>
    <button type="button" id="stop">정지</button>

    <script>
        var interval1;
        $("#start").on("click", function () {

             interval1 = setInterval(function () {
                var a = parseInt(Math.random() * 256);
                var b = parseInt(Math.random() * 256);
                var c = parseInt(Math.random() * 256);

                $("#color").html("rgb(" + a + "," + b + "," + c + ")");
                var color = $("#color").text();

                $("#area").css("backgroundColor", color);
            }, 500);

        });

        $("#stop").on("click", function (event) {
            alert("STOP");
            window.clearInterval(interval1);
        });

    </script>

</body>
</html>
이미지 조절
버튼에 작성된대로 사진을 이미지를 조절한다.

<!DOCTYPE html>
<html lang="ko">
<head>
    <meta charset="UTF-8">
    <meta name="viewport" content="width=device-width, initial-scale=1.0">
    <title>html문서 제목</title>
    <script src="https://code.jquery.com/jquery-3.5.1.min.js"></script>
</head>
<body>
    <button type="button" id="btn1">확대되면서 보여지기</button>
    <button type="button" id='btn2'>축소되면서 숨기기</button><br>
    <button type="button" id="btn3">불투명해지면서 보여지기</button>
    <button type="button" id="btn4">투명해지면서 숨기기</button><br>

    <img  id="pika" src="/image/강아지.gif">

    <script>
        $("#btn1").on("click",function(){
            $("#pika").show(1000);
        })
        $("#btn2").on("click",function(){
            $("#pika").hide(1000);
        })
        $("#btn3").on("click",function(){
            $("#pika").fadeIn(1000);
        })
        $("#btn4").on("click",function(){
            $("#pika").fadeOut(1000);

        })
    </script>

</body>
</html>
공유하기
Twitter Google+ LinkedIn

댓글남기기